KPI Fire 3.1 Release Notes
Project Benefits
Based on feedback from you, our favorite customers, KPI Fire released a new feature that allows you to enter Project Benefit information in monthly, quarterly, and other time increments in the new Project Benefits tab.
This is a change to how you enter Project Benefit data. Previously you would enter a single value in the project charter for target and actual Hard and Soft savings. Now you will use the Project Benefits tab to enter this data.
To enter Project Benefits information like Hard Savings, Soft Savings, and Project Cost follow these steps.
Step 1: Go to the new Project Benefit tab in any project.
Step 2: Enter data by clicking on the heading / title of the tile and enter the data in the data table. There are 2 levels of metrics by default, similar to the project benefit metrics you usually see on your project charter.
Step 3: You can change the time period shown on the tab by scrolling left or right in the tile.
Step 4: Each Level 1 and Level 2 metric is summarized in the new Project Benefits page which can be found by clicking on the dollar sign icon in the project area.
To customize the names and tiles of Project Benefits Metrics for specific workflows follow these steps.
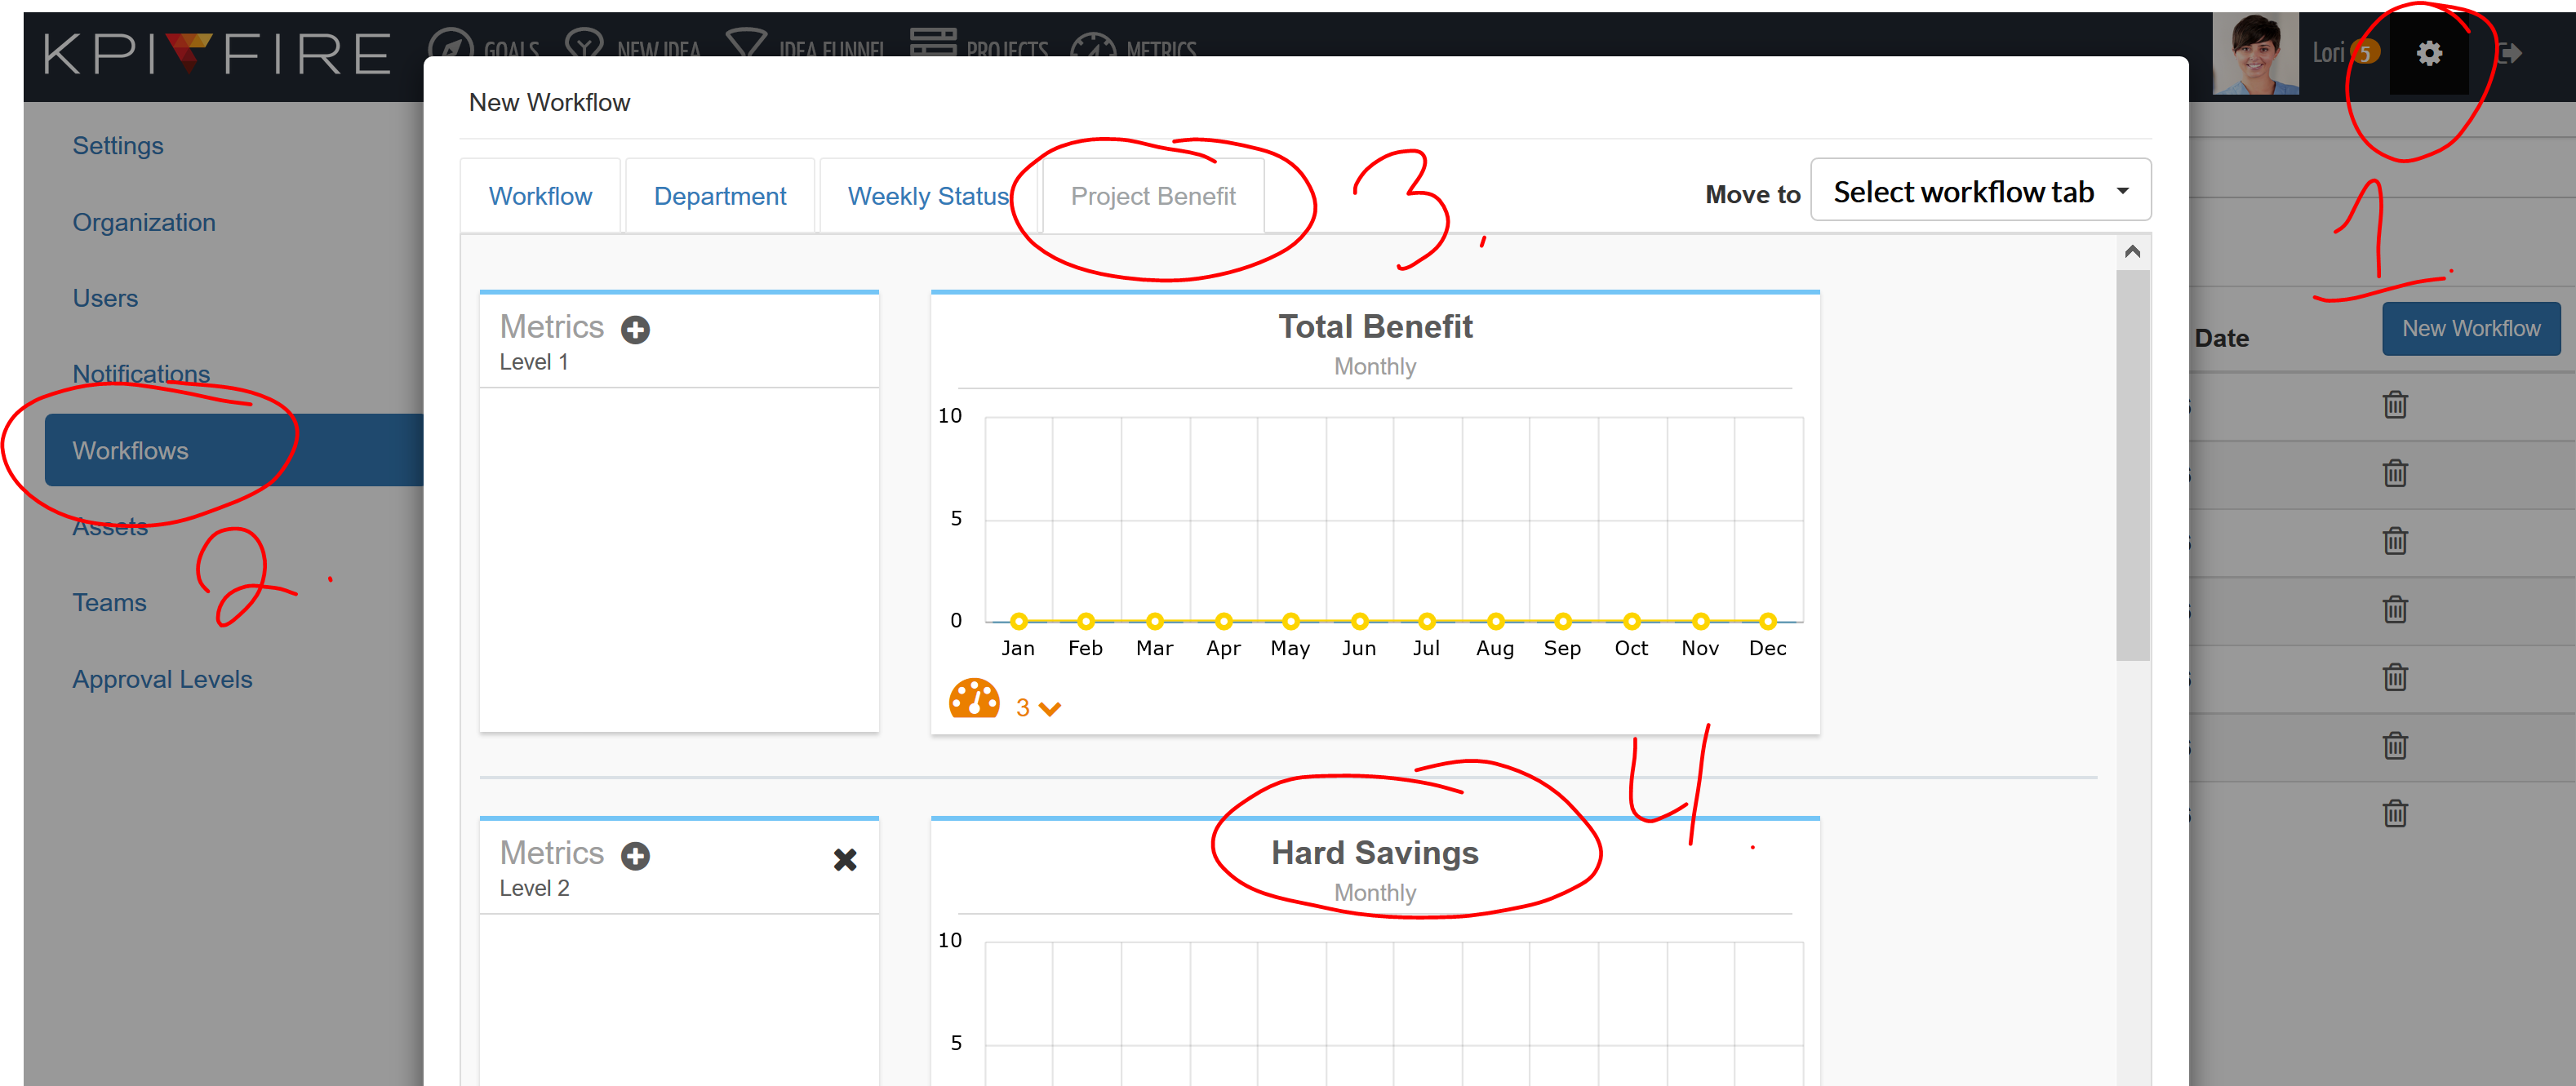
Step 1: If you are an administrator, go to the Settings area and open the Workflow tab.
Step 2: Open a workflow and go to the Project Benefits tab.
Step 3: By default there is one Level 1 metric titled Total Benefit and three Level 2 metrics called Hard Savings, Soft Savings, and Project Costs. You will recognize these from the top right of your project charter page. You can change the title of these metrics, add or remove them.

kpifire project benefits page
Customization of Project Benefits metrics

kpifire project benefit metric

scrolling kpifire metrics to show benefits in different time periods


