KPI Fire’s workflow feature provides a combination of predefined workflows that you can choose from or you can build your own and use them as project templates.
Each workflow includes customizable options for:
- Project Charter Layout
- Workflow for Tasks & Task Groups
- Project Benefits with Lock/Unlock option
- Access control by department
- Default Approval options
Each new KPI Fire account includes a set of templates that bring best practices of Lean and 6 Sigma and make them available to you. Your Admin Licenses Users can browse through the available templates in: Settings>>Workflows
You can organize your workflows into Tabs. By default you should see a “General” tab, or you can add new tabs.
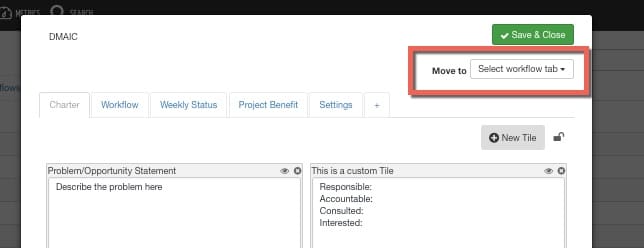
To copy/clone one of these templates to your own account, click on the desired workflow template and use the “Move to” option to copy it to one of your desired tabs. Once you copy/move the template to your own account, you can begin making changes to it. And remember to enable the workflow for your desired departments in the Settings tab. (see below)
Once you have copied the desired template you can change the following areas:
Customizable Project Charter. Customize your project charter or add default text into any of the boxes to start a project.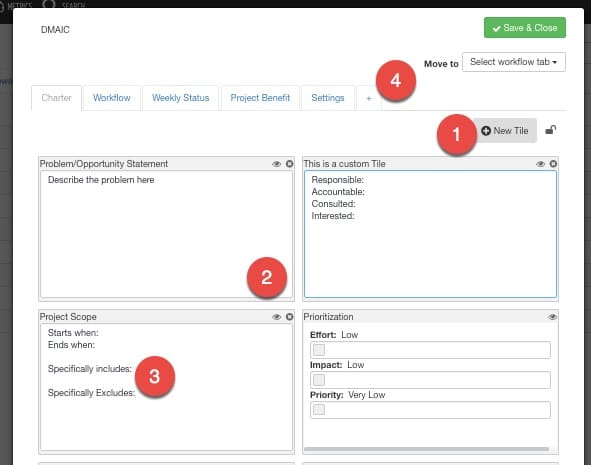
- Click New Tile to add a new tile to the charter tab.
- Click-drag the bottom corner of each tile to change the size, or grab the tile by the title bar to change its location.
- Add default text to any project charter box.
- Create a new tab for even more customization options.
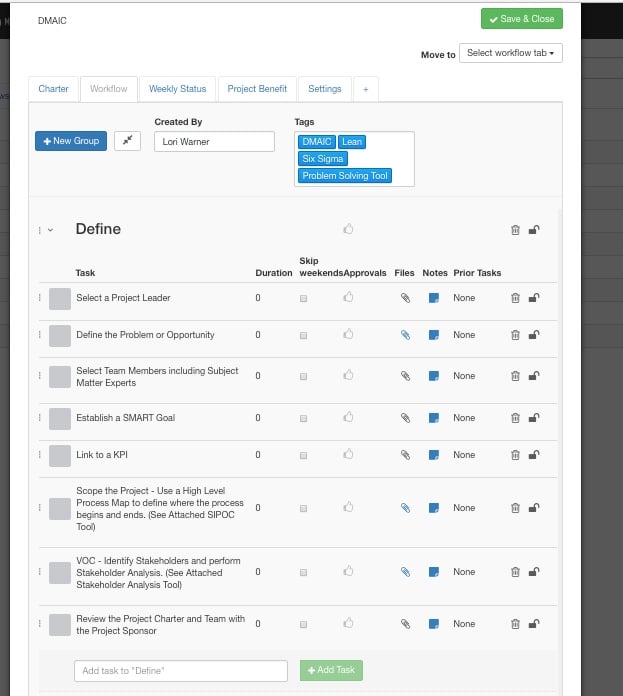
Tasks & Task Groups
- Add new Tasks or task groups
- Each task can have default note text or default attachments
- Tasks can be locked/unlocked
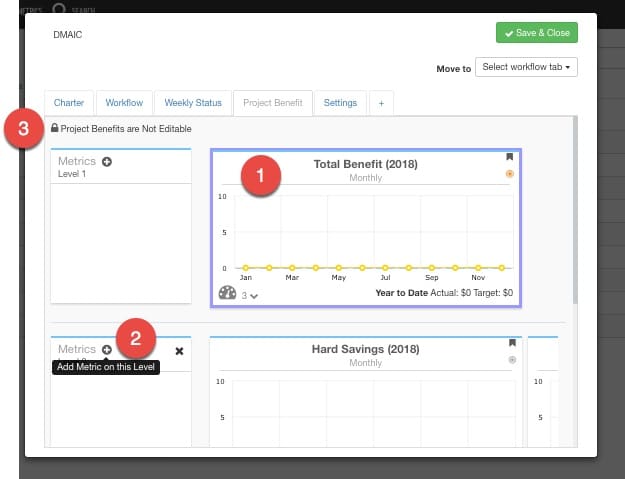
Custom Project Benefits
Each workflow can contain custom Project Benefits. To add a new project benefit click the Level ABOVE the level where you want to add the benefit by clicking on the Parent benefit. You should see a blue outline on the selected benefit. Then click the “+” add button on the next level down to get a “new benefit” box where you can name your new project benefit.
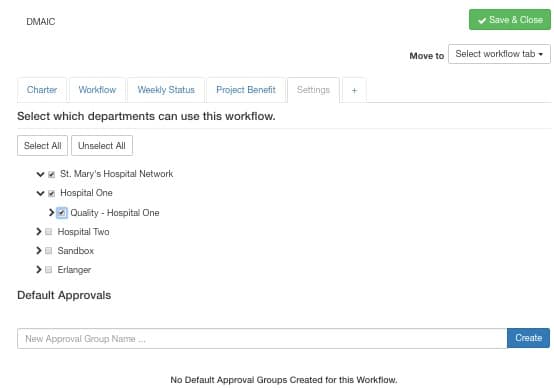
Access control by department
The Settings tab is where you will control which departments can use this workflow. Check the boxes next to each department that should have access to this workflow.
Default approval groups can be configured on the settings tab as well.


