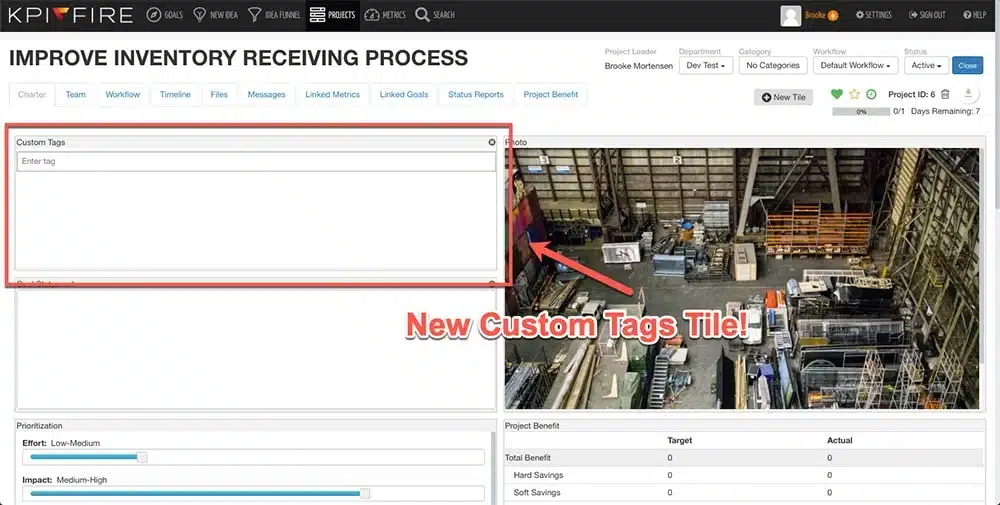
There is a new custom Tags feature available in KPI Fire. This feature is available on the Charter tab of Projects can can be used to organize your projects in to all kinds of new ways, such as tagging; “Projects for Review”, projects by value stream, or any other attribute that is not already captured in Department, Category, or User .
This blog post will show you how:
- Custom Tags are a new tile added in your Project Charter!
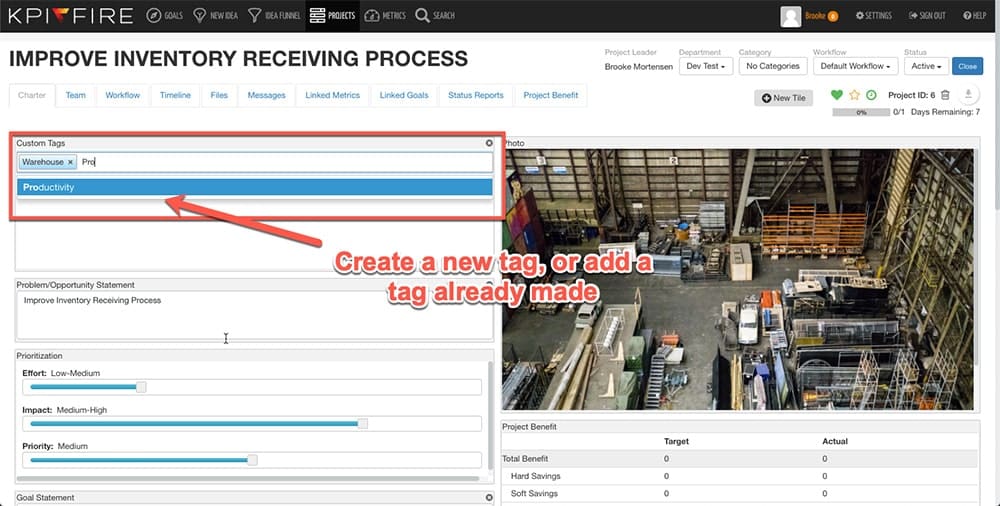
2. Create new tags by typing into the text field, you can create a new tag, or add a tag to a project you’ve already made. (tags are case sensitive)
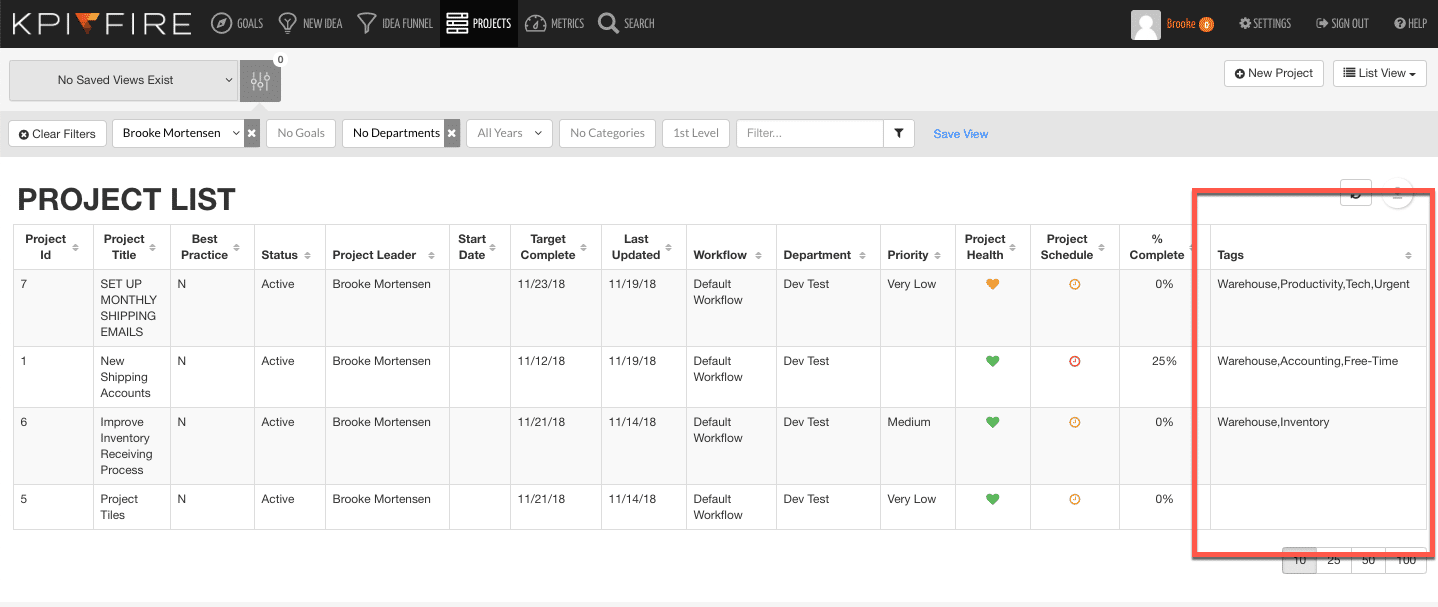
3. Tags are also a new column in your Project List.
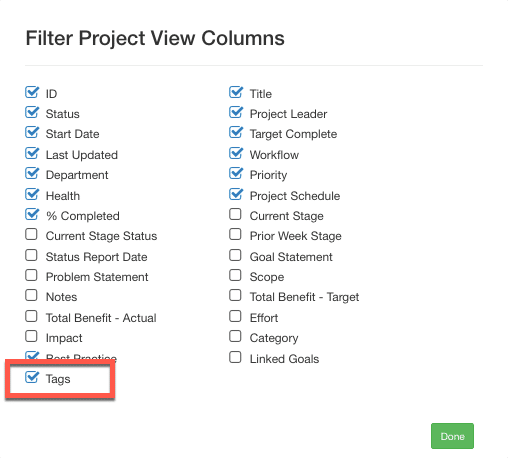
4. Add it to your list by clicking the arrow button and selecting “Edit Columns”.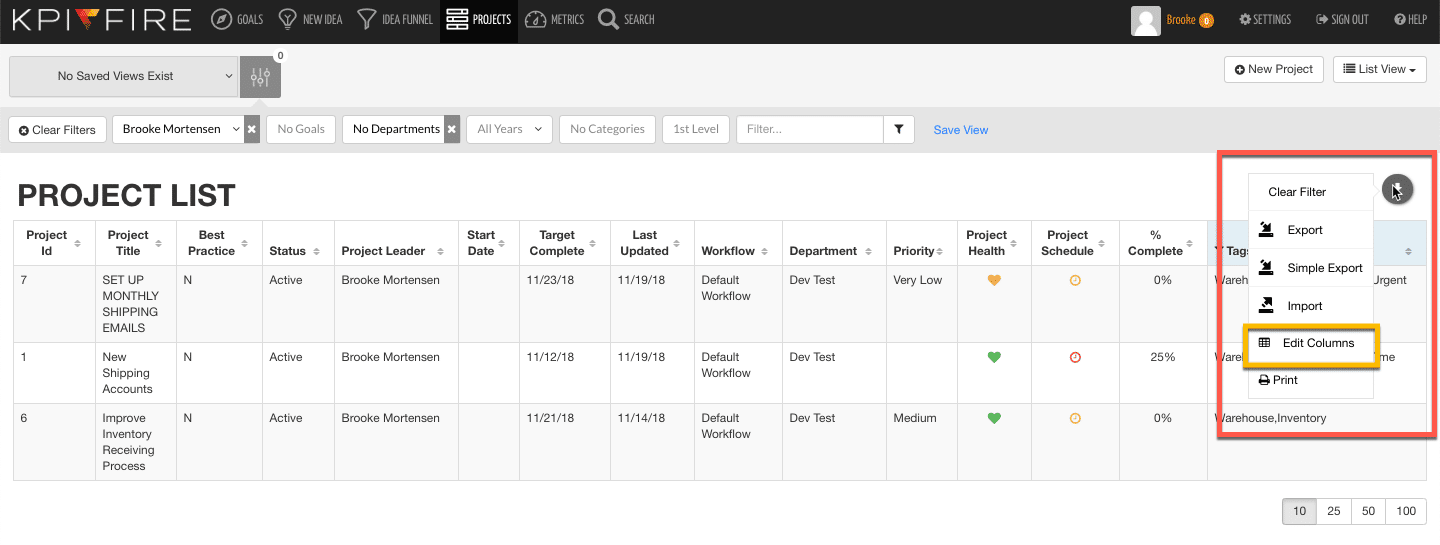
5. You can toggle if tags show up in your project list by checking and unchecking the “Tags” Button.
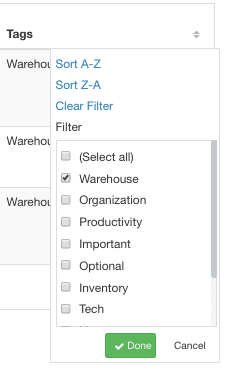
6. Sort your Projects by tags by clicking on the sort icon and checking which tags you’d like to view.
7. To organize and arrange your tags, go to your settings and click on Tags in the left hand column. This Settings area may only be accessible by users with Admin rights.
8. Here, you can add new tags, delete tags, and create nested tags for related projects. Deleting a tag is a way for a system administrator to maintain control over which tags are used, or to eliminate similar or almost duplicate tags.
How are you using tags? Tell us below in comments.
You can also add Tags to Tasks:
